Backend Models
An Indepth guides of the CleverStack NodeJS Backend, covering installation, configuration, usage, extending, testing and much more.

An Indepth guides of the CleverStack NodeJS Backend, covering installation, configuration, usage, extending, testing and much more.
CleverStack comes with a robust and enterprise grade flexible ORM & ODM, that provides database agnostic models that greatly simplifies interaction with one or more databases/servers. That mean's you're focused on your data structures and their relationships, instead of worrying about vendor specific code and implementation details.
I will, in fact, claim that the difference between a bad programmer and a good one is whether he considers his code or his data structures more important. Bad programmers worry about the code. Good programmers worry about data structures and their relationships.
No matter what database your communicating with you can Create, Query, and Manipulate your data without writing any vendor/database specific integration code; The syntax for Querying, Creating, Updating or Destroying models is exactly the same. That mean's you can switch any of your app's model's from MySQL, to Mongo, to PostgreSQL, to MSSQL and back again - without changing any code.
To encourage and support Rapid Application Development, CleverStack is designed to be Convention over Configuration, so we use sane, best practice, conventions, that are fleixble enough to allow you to configure every option if you need to, meaning there are no drawbacks or limitations imposed, just benefits.
And for those times when you need low-level, database-specific functionality, CleverStack provides a query interface that allow's you to talk directly to your model's underlying database server through the use of raw and native queries.Because we use SequelizeJS & MongooseJS for the eventual persistence of data, that gives us the features, support and stability that comes from these mature NodeJS Packages. Our Abstraction Layer manages the internal usage of these npm packages to allow you to define a single model definition regardless of what database (or Databases) you choose to use (or change at any time). That mean's your models are flexible and pain free to write, maintain, and use.
To make querying/searching your data as simple as possible, Dynamic Finders are automatically generated for every Field based on their name. For example if we had a field named firstName on the UserModel, one of the dynamic finders for this field will be UserModel.findByFirstName - please see Dynamic Finders for more information.
To find information about defining models please see Model Definition, Field Definition and Field Types.
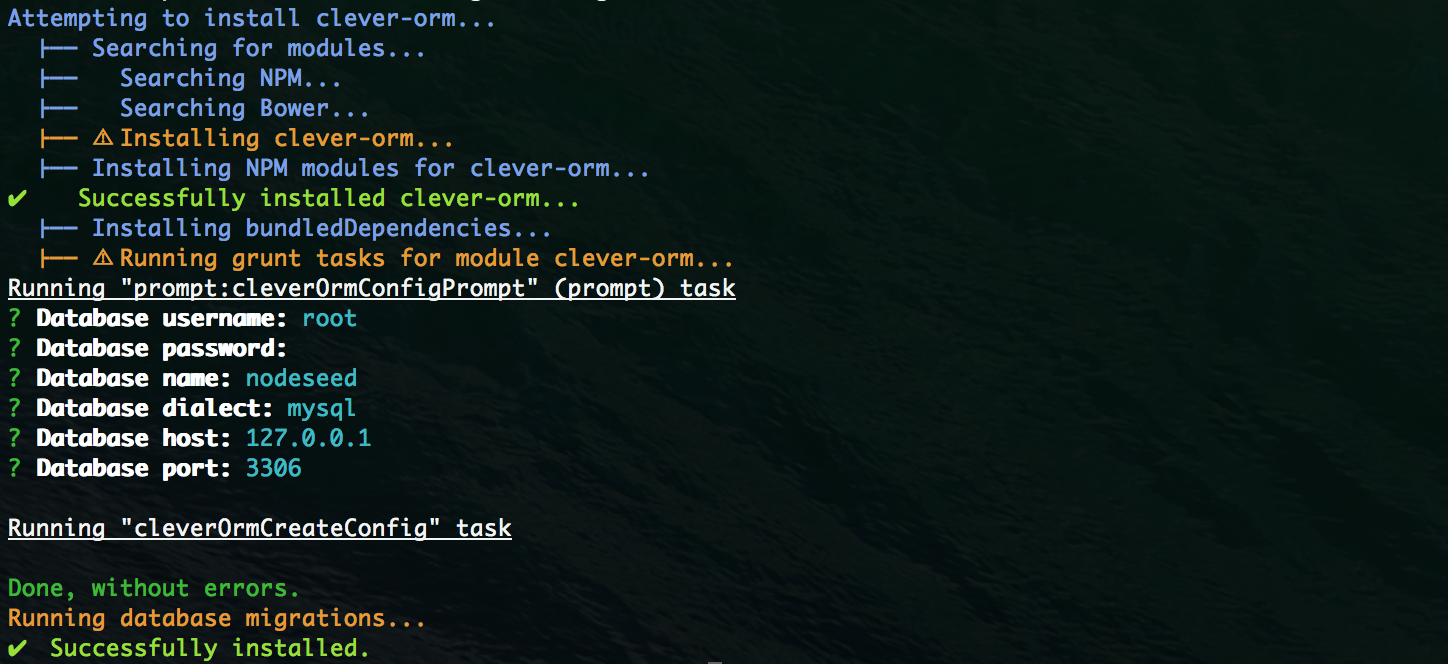
Simply run clever install with the name of the module you want to install, clever-orm for the Object Relational Mapper, or clever-odm for the Object Document Mapper.
clever install clever-ormclever install clever-odm
cd my-project/backend/CREATE DATABASE `nodeseed`If you see a command failed error in your terminal/console after installing a module and seeing a message that states it's about to rebase or seed your database, it is highly likely that something is wrong with your configuration that you need to fix.
See Configuration and Seed Data for information.
After running this command you may be prompted to configure the module/s your installing, see Configuration for more information. Additionally you may be prompted to setup the seed data for the module/s your installing, see Seed Data for more information.
Following the CleverStack Backend Configuration convention/system, you define your configuration for the ORM and ODM inside of the backend/config/global.json (for global defaults), and environment name based backend/config/local.json (local is for use on your development machine, then dev.json, stag.json and prod.json are used for their respective environments.)
 1 {
 2   "clever-orm": {
 3     "db": {
 4       "username": "root",
 5       "password": "",
 6       "database": "nodeseed",
 7       "options": {
 8         "dialect": "mysql",
 9         "host": "localhost",
10         "port": 3306
11       }
12     },
13     "modelAssociations": {}
14   },
15   "clever-odm": {
16     "uri": "mongodb://localhost/nodeseed",
17     "mongoose": {
18       "debug": true
19     }
20   }
21 }We wanted configuration to be as simple as possible to define, so in addition to manually editing JSON configuration files we provided some helpful and handy grunt tasks using prompts for information. These prompts will be run automatically upon installation of any CleverStack Module, but can be run at any time to help manage your configuration.
grunt prompt:cleverOrmConfig
// and
grunt prompt:cleverOdmConfig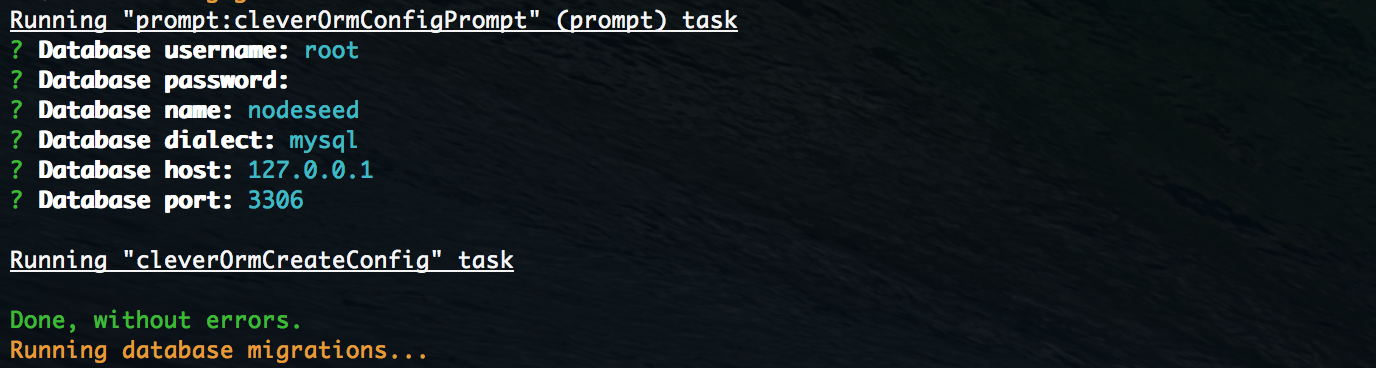
To define mappings between a model and a table/collection, you use the Model.extend() method. There are 3 arguments that you can supply when calling extend.
| Name | Type | Description |
|---|---|---|
| tableName Optional |
|
Optionally as the First Argument , Set the tableName of the Model (table/collection name), If you do not call extend with this argument the name of the file (less "Model") will be used, for example if the filename is UserModel.js, then the name will be set to User. |
| Class Optional |
|
Optionally as the Second Argument, Define Options, Methods/Finders and Templated Event Handlers in this Object. |
| Prototype Required |
|
After all other optional arguments, the third (or first if you don't provide any optional arguments), Define Field Definition, Instance Methods, Getters/Setters and Templated Event Handlers in this Object. |
 1 Model.extend('User',
 2 /* @Class */
 3 {
 4   timeStampable : true,
 5   createdAt     : 'signUpDate',
 6 },
 7 /* @Instance */
 8 {
 9   firstName       : String,
10   lastName        : String,
11   password: {
12     type          : String,
13     required      : true
14   },
15   email: {
16     type          : String,
17     required      : true,
18     unique        : true,
19     validate: {
20       email       : true
21     }
22   },
23   setPassword: function(password) {
24     this.password = hashPassword(password);
25   },
26   getFullName: function() {
27     return [this.firstname, this.lastname].join(' ')
28   },
29   isSuperAdmin: function() {
30     if (this.firstName === 'Richard') {
31       return true;
32     }
33     return false;
34   }
35 });
In this example we defined a model called User, that has a firstName and lastName, a password that is required, and an email that is required and must validate as an email, and because we did not specify any field's as the primary key, it will also have an id as the primary key that is automatically incrementing.
Additionally because we provided the timeStampable and createdAt options in the model definition, it will have two additional read-only field's that automatically set their values when you create or update the model, signUpDate and updatedAt.
Because we want to hash the users password before saving it in the database, we provided a custom Setter called setPassword, that will be used to set any users password. And because we want our model to output a virtual field (named fullName, we added a Getter called getFullName - this will be used whenever you get user.fullName and will also be in the JSON when you serialize the object using JSON.stringify()
To demonstrate how to define and use Instance Methods we have added a function called isSuperAdmin(), and in the next example we will show an example of how to use this function.
id Field'sIf no primary key is specified in your model definition (like the above example), then an auto incrementing id field is added automatically.
For help defining options like timeStampable or to find a list of all the options available, please see Options.
For help defining Model Field's like firstName, lastName or email please see Field Definition.
Additionally please see Field Types for help with any Field's type Option.
If you use underscored: true and freezeDbName: true as options, either globally or for a single extend call, you will need to set the option dbName to the underscored_table_name.
nameBecause our Classes export a constructor Function which has a name of Class, and JavaScript function's automatically get a non-configurable name that is read-only, you may experience some strange behaviour. We plan to fix this in a coming release.
Model options can be defined inside the Models Static object when using Model.extend( StaticObject, PrototypeObject ) to create a model.
| Property | Type/s | Default | Description |
|---|---|---|---|
| type | |
|
'ORM' or 'ODM', for data persistence with clever-orm and clever-odm modules respectively. |
| dbName |
|
|
Optionally define the database table name for a model, if not defined it will be based on the name of the file containing the model... ie, if the filename is UserModel.js, the dbName will be set to Users. (or User if you have enabled freezeDbName) |
| freezeDbName | |
|
By default table (ORM) and collection (ODM) names are pluralized, if you don't want this behaviour set freezeDbName to true |
| underscored | |
|
By default column names are camelCasedLikeThis, if you want to use underscores like_this in your database, set this to true |
| engine |
|
|
Allows you to specifically override the database storage engine for a model. ORM ONLY |
| charset |
|
|
Allows you to specifically override the database storage charset for a model. ORM ONLY |
| comment |
|
|
Allows you to specifically override the database table comment for a model. ORM ONLY |
| collate |
|
|
Allows you to specifically set the database table collation for a model. ORM ONLY |
| softDeleteable | |
|
Allows you to specifically set the database table collation for a model.
Behaviour |
| deletedAt | |
|
Allows you to set the column name to be used with the softDeleteable behaviour and deletion of models. |
| timeStampable | |
|
Enables timestamping of models on persistence (creating, updating) Behaviour |
| createdAt | |
|
Allows you to set the column name to be used with the timeStampable behaviour and creation of models. |
| updatedAt | |
|
Allows you to set the column name to be used with the timeStampable behaviour and updating models. |
| versionable | |
|
Enables versioning of models Behaviour |
The Native JavaScript Types we are talking about are, String, Number, Boolean, Buffer, Date and Array. Additionally, there is Model.Types.TINYINT, Model.Types.FLOAT, Model.Types.DECIMAL, Model.Types.BIGINT, Model.Types.TEXT and Model.Types.ENUM
Any Field Type defined in Model.Types, can be called as a function when you define a Field using the Field Type style of Field Definition, That allow's you to define your fields using a shorter syntax (providing you don't need to set options for the Field)
Model.extend({
  // ...
  tinyIntField: Model.Types.TINYINT(length),
  floatField:   Model.Types.FLOAT(length, decimals),
  decimalField: Model.Types.DECIMAL(precision, scale),
  bigIntField:  Model.Types.BIGINT(length),
  enumField:    Model.Types.ENUM(values*), // 'firstValue', 'secondValue' ... etc
  textField:    Model.Types.TEXT() // No arguments
  // ...
});You should not call the functions available at Model.Types when using the Field Options style of Field Definition
There are two main ways you can define fields in your Application, let's take a look at those ways
Model.extend({
  // ...
  firstName : String
  // ...
});
This helps make field definition quick and easy, especially when you only need to define the type of the field.
Model.extend({
  // ...
  firstName: {
    type     : String,
    required : true
  },
  // ...
});| Property | Type/s | Default | Description |
|---|---|---|---|
| type Required |
|
Can be a native JavaScript Type like String and Number, or a Field Type available from Model.Types |
|
| primaryKey | |
|
Set this field as a primary key |
| autoIncrement | |
|
auto increment this field, only works with Number or Int Model.Types.* |
| columnName | |
Specifys that this Field is an alias for a specific column to use in a table (ORM) or collection (ODM). | |
| default | |
Specify a default value to use when none is provided when creating/updating. | |
| allowNull | |
|
Allow this field to be set as null. |
| required | |
|
Make a model field required. |
| unique | |
|
Make a model field unique in the database. |
| comment |
|
|
Add a comment to this field in the database. |
| validate | |
|
Supply an object of validators that will be used to validate the field before saving, see Validation for more information. |
The Reliability of your application is critial, and Validation is one of the most important things you need to do to ensure you're data is stored correctly, this help's your application to be secure, free from bug's and be highly available/reliable.
CleverStack allows you to validate any Field that is defined on any Model, simply by defining the validate Field Option in the Field Definition.
Model.extend({ /* @Prototype */
  // ...
  field: {
    validate: {
      is: ["^[a-z]+$",'i'],     // will only allow letters
      is: /^[a-z]+$/i,          // same as the previous example using real RegExp
      not: ["[a-z]",'i'],       // will not allow letters
      isEmail: true,            // checks for email format (foo@bar.com)
      isUrl: true,              // checks for url format (http://foo.com)
      isIP: true,               // checks for IPv4 (129.89.23.1) or IPv6 format
      isIPv4: true,             // checks for IPv4 (129.89.23.1)
      isIPv6: true,             // checks for IPv6 format
      isAlpha: true,            // will only allow letters
      isAlphanumeric: true      // will only allow alphanumeric characters, so "_abc" will fail
      isNumeric: true           // will only allow numbers
      isInt: true,              // checks for valid integers
      isFloat: true,            // checks for valid floating point numbers
      isDecimal: true,          // checks for any numbers
      isLowercase: true,        // checks for lowercase
      isUppercase: true,        // checks for uppercase
      notNull: true,            // won't allow null
      isNull: true,             // only allows null
      notEmpty: true,           // don't allow empty strings
      equals: 'specific value', // only allow a specific value
      contains: 'foo',          // force specific substrings
      notIn: [['foo', 'bar']],  // check the value is not one of these
      isIn: [['foo', 'bar']],   // check the value is one of these
      notContains: 'bar',       // don't allow specific substrings
      len: [2,10],              // only allow values with length between 2 and 10
      isUUID: 4,                // only allow uuids
      isDate: true,             // only allow date strings
      isAfter: "2011-11-05",    // only allow date strings after a specific date
      isBefore: "2011-11-05",   // only allow date strings before a specific date
      max: 23,                  // only allow values
      min: 23,                  // only allow values >= 23
      isArray: true,            // only allow arrays
      isCreditCard: true,       // check for valid credit card numbers

      // custom validations are also possible:
      isEven: function(value) {
        if(parseInt(value) % 2 != 0) {
          throw new Error('Only even values are allowed!')
        // we also are in the model's context here, so this.otherField
        // would get the value of otherField if it existed
        }
      }
    },
  }
  // ...
});validator NPM Moduleincludes all available validators provided by CleverStack, for a list of other validators available see the Validation Functions provided by the validator NPM Module.
Keep thing's simple in your Controllers and Services, unless the controller or service in question is not backed by a model. Don't do extra validation inside your Controllers or Services. Restrict your validation efforts to validating field's on your Models as much as possible!
var user = new UserModel({
  firstName : 'Richard',
  lastName  : 'Gustin'
});
And later, if you want to save the instance (persist) to the database:
// To persist the instance to the database (the same result as calling create like below)
user.save().then(function(user) {
  /*
    {
      id: 1,
      firstName: 'Richard',
      lastName: 'Gustin'
    }
  */
});UserModel.create({
firstName : 'Richard',
lastName : 'Gustin'
}).then(function(user) {
/*
{
id: 1,
firstName: 'Richard',
lastName: 'Gustin'
}
*/
})There are a few ways to update the data stored in your database, lets take a look:
// 1) Updating an instance directly
user.firstName = 'Richo';
user.save().then(function(user) {
  /*
    {
      id: 1,
      firstName: 'Richo',
      lastName: 'Gustin'
    }
  */
});

// 2) Using Model.update()
UserModel.update({firstName: 'Richo'}, {id: 1}).then(function(user) {
  /*
    {
      id: 1,
      firstName: 'Richo'
    }
  */
});
SQL Generated by the both ways in the above code:
UPDATE `Users` SET `firstName` = 'Richo' WHERE `id` = 1;It's important to note that Model.update() does not perform any SELECT's, meaning that after your UPDATE has completed you will only get back model field's that you updated or used as WHERE criteria.
If you want to have all of the records data returned (as apposed to Model.update), simply use the findAndUpdate method.
UserModel.findAndUpdate({firstName: 'Richo'}, {id: 1}).then(function(user) {
  // user will only contain all the data, because this method first
  // performs a SELECT before updating the record.
});
SQL Generated by Model.findAndUpdate()
SELECT * FROM `Users` WHERE `id` = 1;
UPDATE `Users` SET `firstName` = 'Richo' WHERE `id` = 1;There are a couple of ways to delete instances stored in your database, lets take a look:
// 1) Destroying/deleting an instance directly
user.destroy().then(function() {
  // DELETED
});

// 2) Using Model.destroy()
UserModel.destroy({firstName: 'Richo'}, {id: 1}).then(function(user) {
  // DELETED
});
SQL Generated by the both ways in the above code:
DELETE FROM `Users` WHERE `id` = 1;Models in Finder/Methods are designed to get data from the database. The returned data isn't just a plain object, but instances of one of the defined classes, CleverStack provides easy to use finders as well as methods to find, create, update and delete model instances.
CleverStack provides a powerful query interface for finding your model instances quick and painfree, from simple queries to complex queries with multiple nested AND and OR conditions CleverStack is here to do the heavy lifting.
UserModel.findAll({
  where: {
    status: 'Active'
  }
});UserModel.findAll({
where: {
id: {
$gt: 6, // id > 6
$gte: 6, // id >= 6
$lt: 10, // id < 10
$lte: 10, // id
$ne: 20, // id != 20
$not: 3, // id NOT 3
$between: [6, 10], // BETWEEN 6 AND 10
$notBetween: [11, 15], // NOT BETWEEN 11 AND 15
$in: [1, 2], // IN [1, 2]
$like: '%hat', // LIKE '%hat'
$notLike: '%hat' // NOT LIKE '%hat'
$iLike: '%hat' // ILIKE '%hat' (case insensitive)
$notILike: '%hat' // NOT ILIKE '%hat'
$overlap: [1, 2] // && [1, 2] (PG array overlap operator)
$contains: [1, 2] // @> [1, 2] (PG array contains operator)
$contained: [1, 2] // <@ [1, 2] (PG array contained by operator)
}
}
});Project.find({
where: {
name: 'a project',
$or: [
{ id: [1,2,3] },
{ id: { $gt: 10 } }
]
}
});// search for known ids
UserModel.find(123).then(function(user) {
// user will be an instance of UserModel and stores the content of the table entry
// with id 123. if such an entry is not defined you will get null
})
// search for attributes
UserModel.find({ where: {title: 'aUserModel'} }).then(function(user) {
// user will be the first entry of the UserModels table with the title 'aUserModel' || null
})
UserModel.find({
where: {title: 'aUserModel'},
attributes: ['id', ['name', 'title']]
}).then(function(user) {
// user will be the first entry of the UserModels table with the title 'aUserModel' || null
// user.title will contain the name of the user
})// find multiple entries
Project.findAll().then(function(projects) {
// projects will be an array of all Project instances
})
// also possible:
Project.all().then(function(projects) {
// projects will be an array of all Project instances
})
// search for specific attributes - hash usage
Project.findAll({ where: { name: 'A Project' } }).then(function(projects) {
// projects will be an array of Project instances with the specified name
})
// Complex filtering of fields
UserModel.findAll({
  where: {
    id: {
      $gt: 6,                // id > 6
      $gte: 6,               // id >= 6
      $lt: 10,               // id < 10
      $lte: 10,              // id
      $ne: 20,               // id != 20
      $not: 3,               // id NOT 3
      $between: [6, 10],     // BETWEEN 6 AND 10
      $notBetween: [11, 15], // NOT BETWEEN 11 AND 15
      $in: [1, 2],           // IN [1, 2]
      $like: '%hat',         // LIKE '%hat'
      $notLike: '%hat'       // NOT LIKE '%hat'
      $iLike: '%hat'         // ILIKE '%hat' (case insensitive)
      $notILike: '%hat'      // NOT ILIKE '%hat'
      $overlap: [1, 2]       // && [1, 2] (PG array overlap operator)
      $contains: [1, 2]      // @> [1, 2] (PG array contains operator)
      $contained: [1, 2]     // <@ [1, 2] (PG array contained by operator)
    }
  }
});The method findOrCreate can be used to check if a certain element already exists in the database before creating an instance, if the model already exists in the database the result will be that instance. If the instance does not yet exist, it will be created.
Let's assume we have an empty database with a User model which has a username and a location.
UserModel
  .findOrCreate({where: {username: 'pilsy'}, defaults: {location: 'Brisbane, Australia'}})
  .spread(function(user, created) {
    console.log(user.values)
    console.log(created)

    /*
      {
        username: 'pilsy',
        location: 'Brisbane, Australia',
        id: 1,
        createdAt: Tue Feb 24 2013 01: 36: 21 GMT + 01000(AEST),
        updatedAt: Tue Feb 24 2013 01: 36: 21 GMT + 01000(AEST)
      }
      created: true
    */
  });
The code created a new instance. So when we already have an instance ...
UserModel
  .findOrCreate({where: {username: 'pilsy'}, defaults: {location: 'Brisbane, Australia'}})
  .spread(function(user, created) {
    console.log(user.values)
    console.log(created)

    /*
      {
        username: 'pilsy',
        location: 'Brisbane, Australia',
        id: 1,
        createdAt: Tue Feb 24 2013 01: 36: 21 GMT + 01000(AEST),
        updatedAt: Tue Feb 24 2013 01: 36: 21 GMT + 01000(AEST)
      }
      created: false
    */
})modelDataTo make finding model instances as simple as possible, every Field will have two Dynamic Finders automatically generated, Model.findByFieldName() which can be used to find multiple Model Instances, and Model.findAllByFieldName() to find a single Model Instance. Behind the scenes Dynamic Finders simply create the where object to find by any fields name, and calls the find() and findAll() methods.
For a Field called Username, these will be the default Dynamic Finders Generated for findBy, findAllBy and countBy
findByName
findByNameIn
findByNameLike
findByNameNotLike
findByNameILike
findByNameNotILike
findByNameStartsWith
findByNameEndsWith
findByNameNot
findByNameNotEqual
findByNameBetween
findByNameNotBetween
findByNameGreaterThan
findByNameLessThan
findByNameGreaterThanOrEqualTo
findByNameLessThanOrEqualTo
findByNameContains
findByNameDoesNotContain
findByNameContained
findByNameOverlap

// You will also have the same style of finders for, findAllBy* and countAllBy*.
findAllByUsername('richard')
countAllByUsername('richard')Used for every query that is executed on the database, this is where transaction information is held.
| Name | Type/s | Description |
|---|---|---|
| transaction Optional |
Object | Any current transaction to be used with the database query |
Used in finders or methods that retrieve/select data.
| Property | Type | Description |
|---|---|---|
| where Required |
|
Define the Field's and their values that you want to filter results by. For a detail look at using the where criteria
|
| limit Optional |
|
Specify the Maximum number of records you want to retrieve from the database. |
| offset Optional |
|
Specify the Page Number (offset) that you want to retrieve from the database, this is used with the limit findOption to provide Pagination for your Query Results. |
| order Optional |
|
|
| include Optional |
|
Eager Load (nested infinitely) Assocations/Relations. |
To allow you to easily extend functionality without modifying the core you are able to subscribe to Events that are emitted throughout the lifecycle of a Model.
Hook into event via EventEmitter.on()
UserModel.on('beforeCreate', function(values, queryOptions, callback) {
  // fire callback(err) when your done
});
Hook into an event on an individual model by putting a named function in the Class/Static section of its definition.
Model.extend('User',
{
  beforeCreate: function(values, queryOptions, callback) {
    // fire callback(err) when your done
  }
},
{
  // ...
})// You can also do the same thing for Controllers and Services (in the Class/Static section)
Model.extend('Location',
/* @Class */
{
'UserModel beforeCreate': function(modelData, queryOptions, callback) {
// Templated Event Handler for the UserModel "beforeCreate", this will be set to UserModel
}
},
/* @Prototype */
{
// ...
})Finding instances
Creating/updating instances
Destroying instances
find() and findAll().
Model.extend('User',
/* @Class */
{
  type: 'ORM',

  // Or as a templated event handler in any Controller, Service or Model.
  // 'UserModel beforeCreate':
  beforeCreate: function(values, queryOptions, callback) {
    // fire callback(err) when your done
  }
},
/* @Instance */
{
  id        : Number,
  firstName : String,
  lastName  : String
});findAll().
// ...
  beforeFindAllOptions: function(findOptions, queryOptions, callback) {
    callback(null);
  }
// ...findAll() is called.
// ...
  beforeFindAll: function(findOptions, queryOptions, callback) {
    callback(null);
  }
// ...find().
// ...
  beforeFindOptions: function(findOptions, queryOptions, callback) {
    callback(null);
  }
// ...find() is called.
// ...
  beforeFind: function(findOptions, queryOptions, callback) {
    callback(null);
  }
// ...findAll() is called, with the result from the database.
// ...
  afterFindAll: function(instances, findOptions, queryOptions, callback) {
    callback(null);
  }
// ...find() is called, with the result from the database.
// ...
  afterFind: function(instance, findOptions, queryOptions, callback) {
    callback(null);
  }
// ...create() or update().
// ...
  beforeValidate: function(values, queryOptions, callback) {
    callback(null);
  }
// ...create() or update().
// ...
  afterValidate: function(values, queryOptions, callback) {
    callback(null);
  }
// ...create().
// ...
  beforeCreate: function(values, queryOptions, callback) {
    callback(null);
  }
// ...create().
// ...
  beforeValidate: function(instance, values, queryOptions, callback) {
    callback(null);
  }
// ...destroy().
// ...
  beforeDestroy: function(instance, queryOptions, callback) {
    callback(null);
  }
// ...destroy().
// ...
  afterDestroy: function(instance, queryOptions, callback) {
    callback(null);
  }
// ...For when you need helper methods for an individual instance of a model, define instance methods easily in your Models Prototype/Instance section.
In this example we provide an instance method hashPassword which we will use to hash a users password before setting it.
Model.extend('User',
{
  type: 'ORM'
},
{
  hashPassword: function(password) {
    this.debug('Hashing users password');
    this.password = crypto.createHash('sha1').update(password).digest('hex');
  }
});Defining Getters and/or Setters for Models in CleverStack is easy, simply create a function prefixed with either get or set, for Example getFirstName will be used as the getter for any field named firstName.
Example:
Model.extend('User',
{
  type      : 'ORM'
},
{
  firstName : String,

  setFirstName : function(firstName) {
    this.entity.dataValues.firstName = 'foo' + firstName;
  },

  getFirstName : function() {
    return this.firstName.replace('foo', '');
  }
}Defining associations in CleverStack is easy, you do so by modifying the modelAssociations key inside the configuration for either the entire project, or any individual module. These configurations are then deep merged into a single modelAssociations Object and then applied to your Models.
Configuration Example:
 1 {
 2   "modelAssociations": {
 3     "Account": {
 4       "hasMany"   : ["Role", "Permission", "User"]
 5     },
 6     "Role": {
 7       "belongsTo" : ["Account"],
 8       "hasMany"   : ["Permission"]
 9     },
10     "Permission": {
11       "belongsTo" : ["Account"],
12       "hasMany"   : ["Role"]
13     },
14     "User": {
15       "belongsTo" : ["Account"],
16       "hasOne"    : ["Role"]
17     }
18   }
19 }
In this example we have created the basic Role Based Authentication Control system as provided by clever-auth, clever-accounts, clever-users and clever-roles.
To go into detail
Account has many User's, Role's and Permission's.Role is owned by an Account and has many Permission's assigned to it.Permission is owned by an Account and can be assigned to many Role's.User is owned by an Account and can be assigned one Role.This section of the documentation is either out-dated or incomplete, please ask for help in github or gitter if you need more information.
Starting a transaction is as easy as calling Model.transaction() before calling any model methods that perform queries, additionally you must pass the queryOptions to all methods if you want that query to be performed within the scope of the current transaction ~ once your done either call transaction.commit() or transaction.rollback()
 1 // ...
 2   create: function(values, queryOptions) {
 3     var create  = this._super;
 4
 5     return new Promise(function(resolve, reject) {
 6       queryOptions = queryOptions || {};
 7
 8       this
 9       .transaction(queryOptions)
10       .then(this.proxy(function() {
11         values.password   = values.password || Math.random().toString(36).slice(-14);
12         values.password   = crypto.createHash('sha1').update(values.password).digest('hex');
13
14         return create.apply(this, [values, queryOptions]);
15       }))
16       .then(function(user) {
17         return queryOptions.transaction.commit().then(resolve);
18       })
19       .catch(function(err) {
20         return queryOptions.transaction.rollback().then(reject);
21       });
22     }
23     .bind(this));
24   }
25 // ...To make application development as rapid as possible, CleverStack allows you to define seed data for each module as well as the overall backend project. Each of the modules seedData.json files is deepMerged one by one automatically for every module installed in the modules folder, then finally it is merged into the projects main seedData.json file.
Imagine this was in your backend/schema/seedData.json file:
{
  "UserModel": [
    {
      "firstName": "Clever",
      "lastName" : "User",
      "email"    : "default@cleverstack.io",
      "password" : "a31a61e94f3799a9385dab9966c4c22c9f5790c4",
      "associations": {
        "AccountModel": [{ "name": "Default Account" }]
      }
    }
  ]
}
And that this was in your backend/modules/clever-accounts/schema/seedData.json file:
{
  "AccountModel": [
    {
      "name"      : "Default Account",
      "email"     : "default@cleverstack.io",
      "subDomain" : "default",
      "active"    : true
    }
  ]
}
Then your Fully merged and final seedData.json would look like:
{
  "AccountModel": [
    {
      "name"      : "Default Account",
      "email"     : "default@cleverstack.io",
      "subDomain" : "default",
      "active"    : true
    }
  ],
  "UserModel": [
    {
      "firstName": "Clever",
      "lastName" : "User",
      "email"    : "default@cleverstack.io",
      "password" : "a31a61e94f3799a9385dab9966c4c22c9f5790c4",
      "associations": {
        "AccountModel": [{ "name": "Default Account" }]
      }
    }
  ]
}
Which would create an Account, then a User, after the User has been created it would automatically call User.setAccount() to create the relation between instances in the database.
Hint Use the grunt db:rebase command to create your database structure
$ grunt db:rebaseHint Use the grunt db:seed command to insert your seed data into the database
$ grunt db:seedHint Both of the above db commands can be run together using one command
$ grunt dbHint To re-run the configuration prompt
$ grunt prompt:cleverOrmConfigImportant You should not load models using require(), they must be loaded using the injector
Important Use the SequelizeJS migrations tool to create or run ORM Migrations.